
Moving your woodworking space can feel like a massive undertaking, but it doesn’t have to be overwhelming. Whether you’re relocating to a bigger shop or just moving across town, a little planning can go a long way. Think about all those tools and projects waiting to be unpacked; it’s exciting, right? But before diving into the fun part of setting up your new workshop, there are essential steps to take to ensure everything makes it safely to its new home. So, roll up your sleeves and let’s explore how to make this moving experience as smooth as possible!
Moving your woodworking space involves careful planning, which includes documenting your tools and equipment with photos, properly disassembling larger machinery, and utilizing protective packing materials. Additionally, consider hiring professional movers experienced with heavy equipment, preparing a floor plan for the new location, and ensuring all items are inspected upon arrival for any potential damage. For this reason, many who don’t want the DIY option elect to hire a professional moving company.
Preparing Your Workshop for Relocation
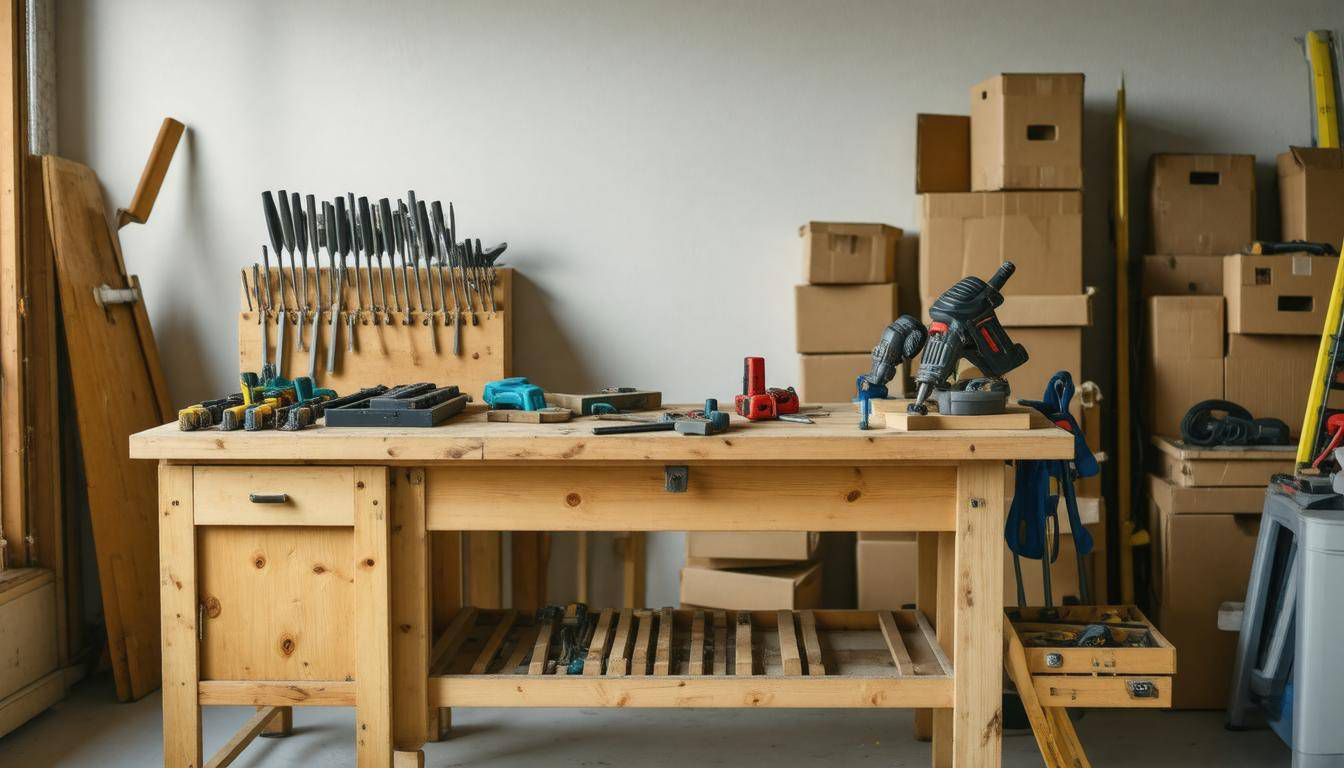
To ensure a successful move, preparation is crucial in maintaining the integrity of your woodworking tools and materials. Begin by generating an inventory list. This isn’t just about counting items—it’s an opportunity to assess what you have. Write down all your tools, machinery, and supplies, categorizing them in a way that suits your workflow (for example, hand tools, power tools, delicate materials). Not only does this make packing simpler, but it also serves as a reference point for any potential damage claims later. Taking photographs can be invaluable here; they provide visual evidence of each item’s condition prior to the move.
Think of it this way: imagine coming across a beloved tool after moving into your new space. You’re thrilled until you notice a scratch that wasn’t there before. An inventory prepared with photos can mitigate such frustrations that arise from hidden damages during transport.
Step-by-Step Guide to Packing
Step 1 – Declutter Your Space
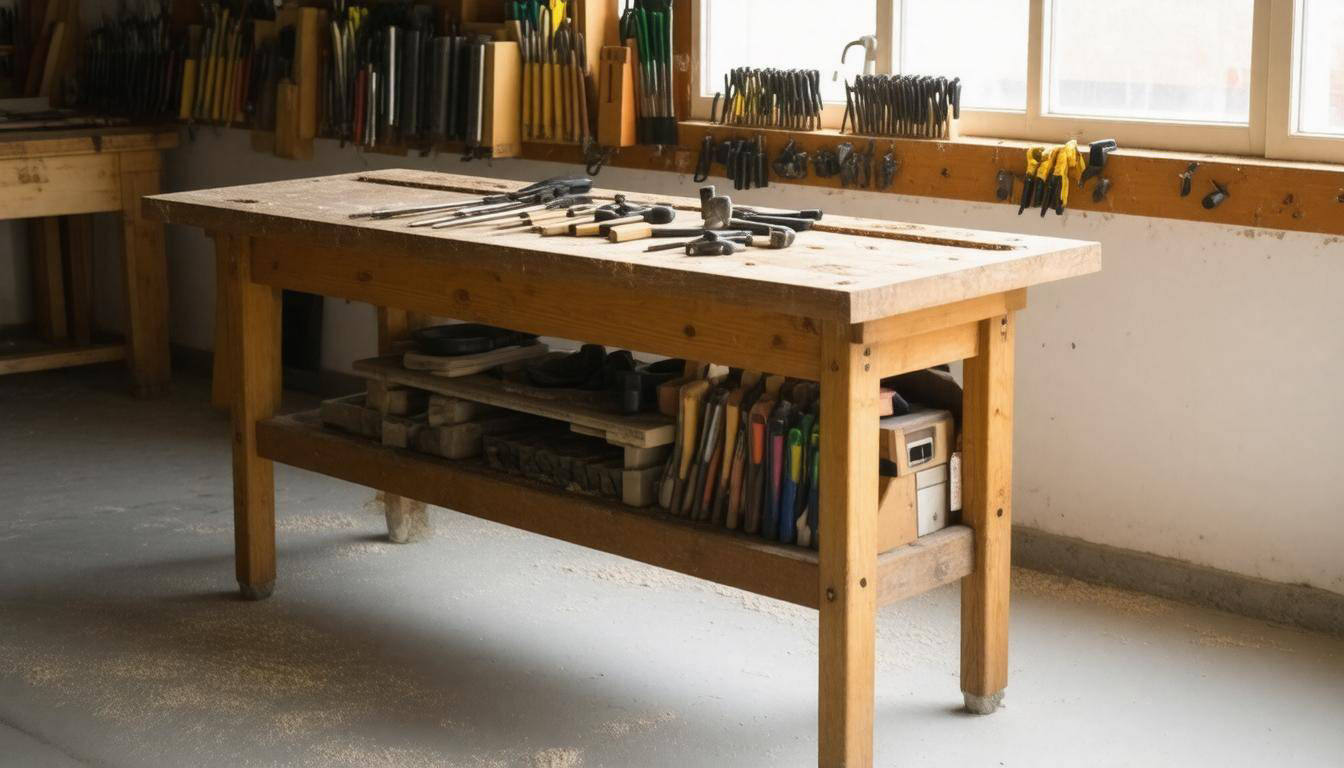
A successful relocation begins by assessing what truly needs to make the journey with you. Use this opportunity to declutter! It’s like spring cleaning for your workshop. Identify tools or materials you no longer use—perhaps dusty equipment or scraps of wood that never found their way into a project. You could decide to sell them online, donate them to local schools, or even dispose of them responsibly. A lighter load not only simplifies packing but also makes the transportation process far more manageable.
“Over the years, I’ve learned that less truly is more when it comes to moving my shop,” recalls long-time woodworker Greg. “Letting go of unused items lightened my load both physically and mentally.”
Step 2 – Gather Packing Supplies
Next, it’s time to gather all necessary packing supplies. The tools you choose matter as much as how you label them. Stock up on sturdy boxes—not flimsy cardboard ones that are prone to collapse under weight—but rather plastic bins and heavy-duty boxes that can withstand the rigors of moving day. Bubble wrap is vital for fragile items, while packing paper adds an extra layer of protection for everything else.
Think of these materials as your army—they’re essential in defending your precious tools against the uncertainties of transit.
Step 3 – Disassemble Furniture and Large Tools
Now that you’ve prepped your inventory and secured your packing materials, turn your attention to disassembling larger pieces of equipment and furniture. Taking apart components not only prevents damage but also saves space in your vehicle or storage unit. For example, saw wings and tables should be removed following manufacturer guidelines. It’s critical to keep screws and small parts together; use labeled bags so you’ll know exactly which screws belong where when it’s time to reassemble.
As you work through this step, remember: organization plays a vital role in minimizing stress during unpacking.
With everything packed away securely, it’s essential to consider how best to transport these often delicate yet valuable tools in order to maintain their condition until they reach their new home.
Packing and Transporting Tools Safely
Properly packing and transporting tools is crucial to ensuring they remain in good condition and arrive at their new destination without a hitch. You want your cherished tools intact and ready for use as soon as possible after the move. Imagine opening those boxes only to find broken equipment or missing parts—what a nightmare! To avoid such predicaments, we’ll explore some practical tips that have been tried and tested in similar relocations.
To start, it’s best to group small tools and supplies together in sturdy plastic bins. Unlike cardboard boxes, these bins are less prone to breaking under weight, offering superior protection from moisture and accidental impacts. A bin can become a fortress for your smaller items; whether it’s screws, wrenches, or nails, having everything neatly organized allows for easy access at your new workshop. It also gives you peace of mind during transport.
Key Considerations
An important aspect of successful tool relocation is securing heavier equipment during transport. Use engine cranes, lifting straps, and ratchet straps when loading heavy tools onto trucks. Just imagine that feeling of dread if heavy items shift while you’re on the road! The best way to prevent that is by anchoring large tools directly to the truck bed using tie-down tracks whenever possible. This ensures your tools stay put and maintains stability throughout the journey.
However, while securing heavy equipment is vital, delicate items require a different approach.
Protect Delicate Equipment
Wrap fragile items like saw blades and chisels in thick towels or bubble wrap before placing them in sturdy containers. These protective layers provide cushioning against impacts during transport. It’s important to think about every piece of equipment as if it were a fragile heirloom; some might even be irreplaceable! Adding padding not only protects against external forces but also prevents any movement inside the box itself. Secure lids tightly or tape down each box to avoid any unexpected openings which could lead to a chaotic spill of the contents.
Additionally, keeping an inventory list can help you track each item during loading and unloading phases. This simple act can save you time—and stress—by allowing you to confirm that everything has made it safely into your new space.
With these safety measures in mind, we now turn our focus toward addressing any critical components requiring specialized handling throughout this transition.
Solutions for Handling Heavy Equipment
When it comes to relocating heavy woodworking equipment, having the right strategies at your disposal can make all the difference. One of the most effective methods is utilizing an engine crane, which provides stability and leverage when lifting machines that would otherwise require multiple people to maneuver. It’s essential to pair this with lifting straps; these ensure that your load is balanced and secure as it rises off the ground. By using both together, you significantly reduce the risk of accidents or damage to you or the machinery.
Alternative Methods
Clearly, sometimes you need a backup plan. Renting a shipping container is a clever alternative that simplifies your moving process. The beauty of a shipping container lies in its accessibility; you can load it directly from the ground without needing to lift items up onto a truck. This method not only reduces injury risks but also minimizes potential damage to your valuable tools, allowing for smoother loading and unloading processes. Just think about how much easier it is to organize your items when they’re all at a manageable height.
You might also consider hiring professional movers experienced in handling heavy equipment—this option can save you labor time and provide invaluable peace of mind. A woodworker named Sarah shared her experience of hiring millwrights to move her substantial collection of tools, totaling around $50,000. She noted, “It was worth every penny. Not only did I save my back, but they got everything set up quickly and correctly.”
Cost-effective Solutions
If you’re on a tighter budget but still need some extra hands, look into local community resources like Facebook groups or neighborhood apps. These platforms serve as excellent avenues for finding temporary labor assistance. Many individuals are eager for work and usually charge around $250 for hours of heavy lifting help, making it an economical option for larger moves within your community.
It’s not just about saving money; it’s about fostering local connections while ensuring your tools arrive at their new home safely.
Having successfully navigated the logistics of moving your tools, the next step involves creating an ideal setup for your workspace that enhances efficiency and creativity.
Setting Up Your New Workspace
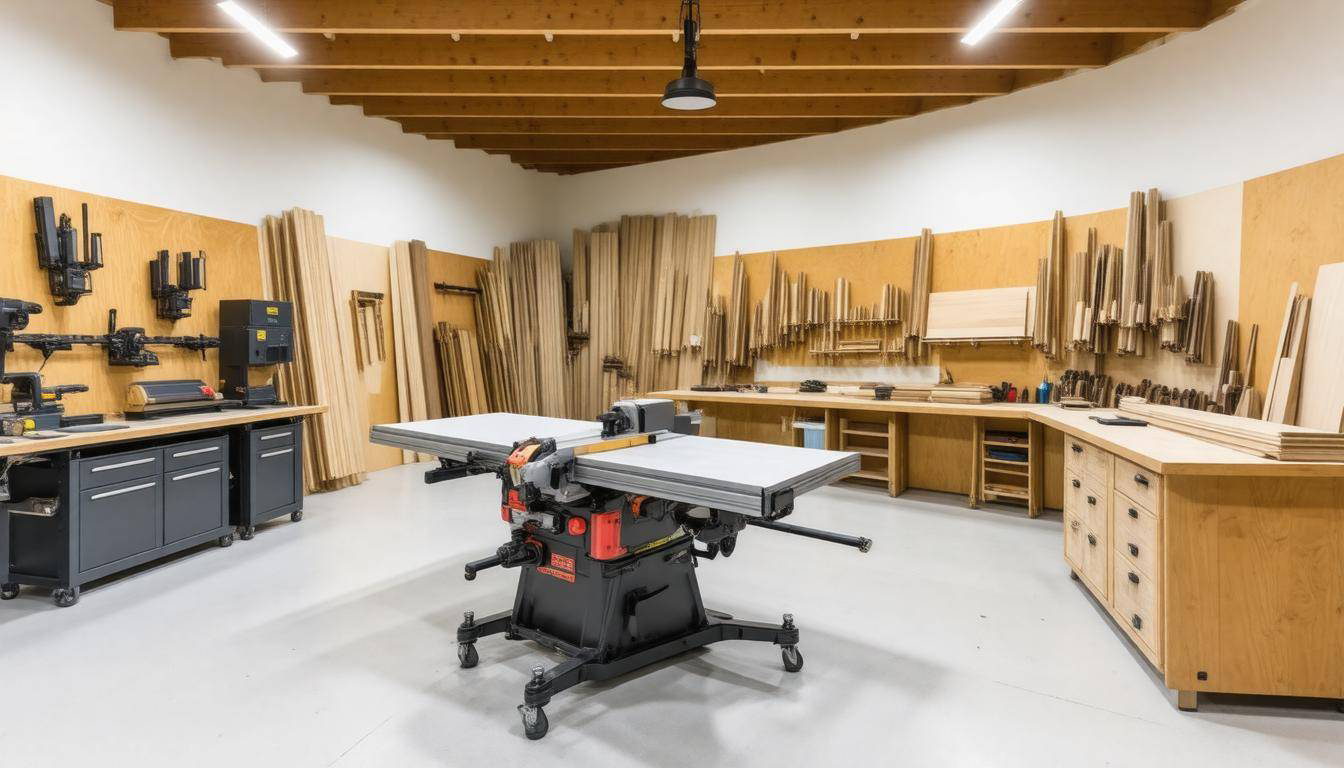
Setting up a new woodworking space can be incredibly rewarding, but organizing it thoughtfully is key to maintaining productivity. Start by measuring your area meticulously. Take note of where windows and doors are located, as well as any electrical outlets and light sources. This knowledge will greatly influence your layout decisions. A well-planned floor plan acts like a blueprint, allowing you to visualize how each piece of equipment will fit and function harmoniously in the space.
After marking out your layout on paper—or digitally if that’s your thing—you can pivot towards placing larger equipment first. Think of it like assembling a puzzle; the larger pieces go in first before filling in with smaller ones. For example, place the table saw and workbenches against walls or in central locations that promote easy workflow. Ensuring that these machines are positioned near power sources ensures you won’t have to wrestle with extended cords or relocate tools later on.
Following this, it’s smart to prioritize workbenches and storage units before unpacking smaller tools. Why? Because establishing a base structure creates an organizational flow essential for efficiency. Consider incorporating mobile tool carts, which add flexibility as you navigate between tasks. With everything finally set in its place, small tools can now be carefully unpacked and organized into drawers and cabinets.
To maintain air quality in your workspace, consider investing in effective dust collection systems. This not only keeps your space clean but also provides a healthier working environment, preventing inhaling fine wood particles during long hours of crafting.
When everything is in its designated spot, take a moment to stand back and admire the setup! It might be tempting to jump right into creating your next masterpiece, but don’t forget that safety should always remain at the forefront. Ensure that all tools are stored properly when not in use; this reduces clutter that can lead to accidents. It also helps when organizing items like clamps on pegboards or racks—this maximizes vertical storage efficiently while still being easily accessible.
Now that your workspace is aligned for optimal functionality and safety, cultivating habits around cleanliness and orderly organization sets the stage for what comes next—ensuring that you maintain a secure environment as you begin your woodworking projects.
Safety Tips During Relocation
One of the most essential aspects when moving a woodworking space is safeguarding yourself and your tools. Navigating through heavy tools and equipment can be quite hazardous if not approached thoughtfully. By embracing the right safety measures, you can create an environment where the risks are minimized and the entire process flows smoothly.
Personal Protective Equipment (PPE)
Always equip yourself with protective gear when tackling heavy tools or organizing dusty spaces. It’s easy to overlook simple safeguards, but proper PPE can significantly reduce the risk of injury or illness. For instance, wearing thick gardening gloves not only protects your hands from splinters but also provides a barrier against sharp edges. To add an extra layer of safety, consider sealing the gloves at the wrist with duct tape. This technique prevents unwanted pests from biting while you’re sifting through old wood storage—something you might encounter in neglected areas.
Once you’ve donned your protective gear and ensured you’re ready for physical labor, focus on how you handle your equipment during loading and unloading.
Secure Loading and Unloading
Move thoughtfully by using proper lifting techniques, which are crucial for avoiding injuries. Remember to bend at your knees instead of your waist; this keeps your center of gravity low and allows for stronger lifting. Additionally, keeping the load close to your body reduces strain on your back. When packing tools for transportation, secure them properly in boxes or crates padded with foam or old blankets. This precaution prevents unexpected shifts that could lead to accidents while en route.
After arriving at your new location and unpacking everything, don’t forget to inspect the condition of your tools.
Inspect Tools Upon Arrival
Once all of your tools and equipment have settled into their new home, it’s critical to conduct a thorough inspection for any damage they may have incurred during transport. A quick glance isn’t enough—check for dents, cracks, or operational issues that could affect performance. Addressing these concerns immediately not only prevents long-term complications but also ensures everything is in working order before diving back into your projects. Moreover, documenting this process can keep you organized; maintain an inventory list to track any items that may need repairs or replacements.
As you prepare to navigate through unforeseen challenges that come with relocation, let’s now explore strategies for overcoming obstacles presented by remote sites.
Navigating Remote or Challenging Locations
Relocating to a rural setting comes with its unique set of challenges. One often overlooked aspect is the availability of transportation options. Large trucks that allow for heavy load capacities may be few and far between when you’re miles away from a bustling city. That’s why it’s essential to start planning early and explore different transportation methods suited to your needs.
For example, a local woodworker once shared, “I had to rent multiple trucks because local-only rental policies restricted liftgate trucks.” This experience highlights how paramount it is to stay ahead of potential logistical nightmares.
In addition to transportation issues, you will likely encounter other obstacles during your move, including limited access to resources such as PODs or U-Pack containers. These challenges necessitate comprehensive planning; securing reliable transportation well in advance ensures you won’t be left scrambling at the last minute.
Overcoming Obstacles
One quirk about relocating to a far-flung area is that you won’t just be moving your tools; you’ll also contend with geography and local conditions that may not accommodate larger vehicles. If you’re faced with limited availability of moving trucks, booking rentals early or even considering local movers might provide the flexibility you need.
Leveraging social media can also prove invaluable in these situations. Many carpenters and woodworkers have successfully found local helpers through community groups or platforms like Facebook Marketplace. By reaching out, you might discover individuals with transportation resources or fellow woodworkers willing to lend a hand on moving day.
| Challenge | Solution |
| Limited availability of moving trucks | Book rentals early or use local movers |
| Wildlife hazards in storage areas | Use protective gear like gloves |
| Securing heavy tools in one-way trucks | Use tie-down tracks and ratchet straps |
As you navigate these hurdles, maintaining safety must remain a top priority. Wildlife can pose unexpected risks when managing your outdoor workspace during relocation. Always wear protective gear when dealing with storage areas that may house critters—gloves and thick boots are recommended for protection. Additionally, securing heavy tools in one-way trucks may require preparation: tie-down tracks and ratchet straps can provide stability for your valuable tools during transport.
While relocating a woodworking shop to a remote location can be complex, strategic planning paired with effective utilization of local resources makes the process smoother than you’d expect.
In summary, approaching your woodworking space relocation with foresight, adaptability, and resourcefulness can ensure an efficient transition while keeping safety at the forefront.